Svantek
This guide walks through connecting Svantek devices to the platform using FTP file uploads. In Svannet, you configure automatic file export and upload those files to an FTP server, which the platform then reads automatically.
Note: We recommend creating a Blueprint and your Sensors first, so that when you map the data source labels at the end of this guide, you have sensors to connect to.
1. Configure Svannet to push files via FTP
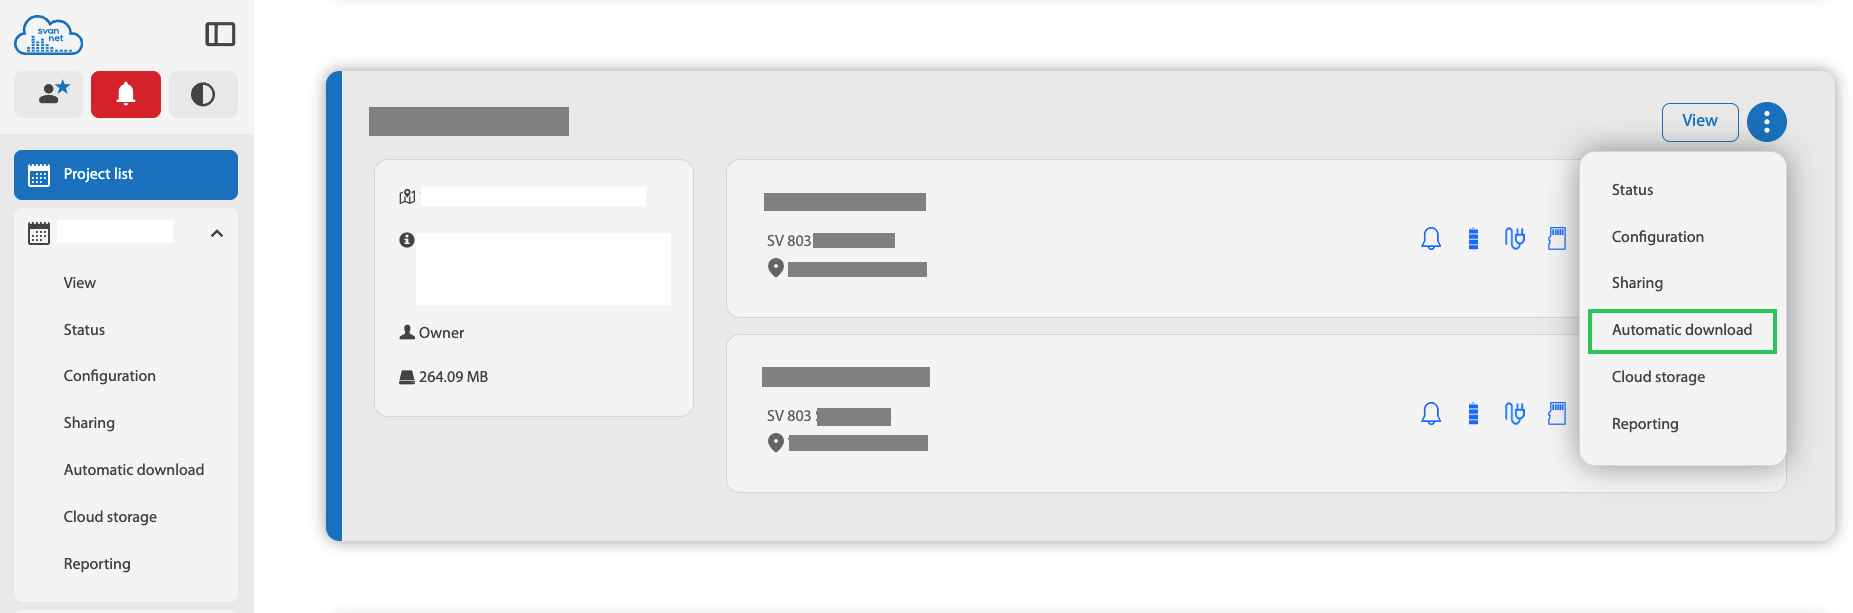
Log in to Svannet and open your project. From the project list, open the project action menu and select Automatic download.
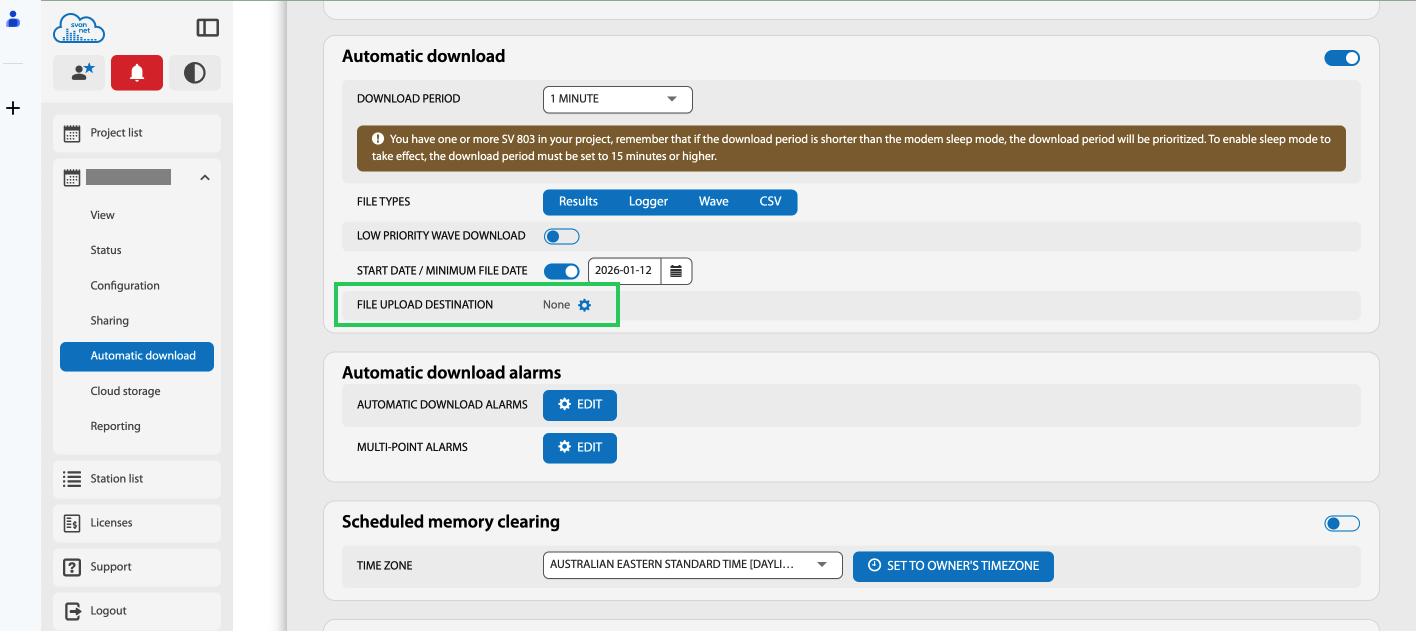
In Automatic download, set the File upload destination and open its settings.
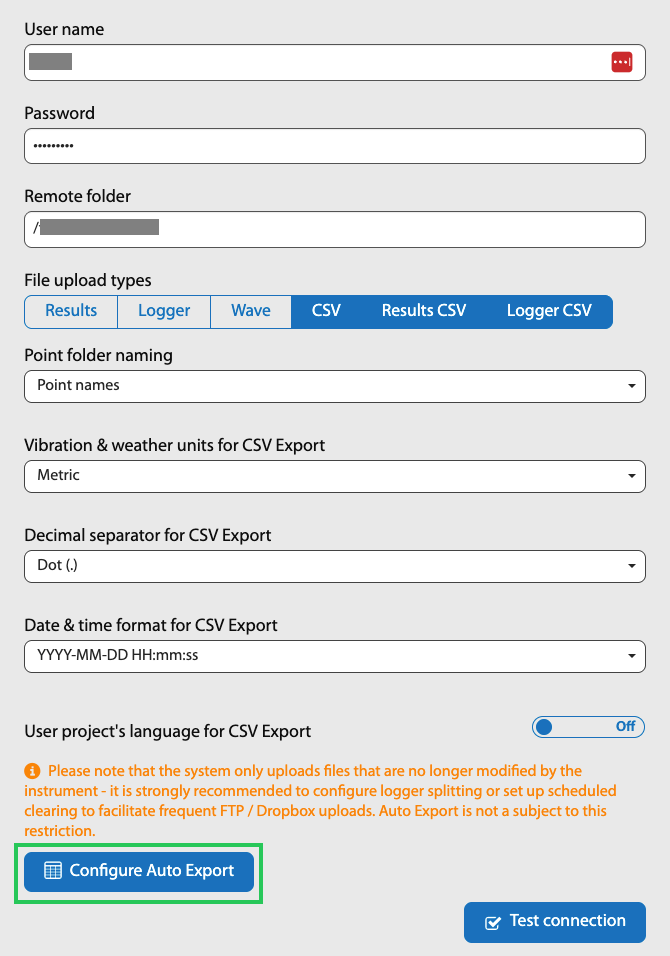
Enter the FTP destination details:
- User name and Password for your FTP account
- Remote folder where Svannet should upload files
- File upload types that should be exported (for example
CSV)
Use Test connection to verify access to the FTP server.
If you want only specific output channels in the exported file, click Configure Auto Export and choose the exact results to include.
In the auto export configuration, select only the outputs required for this integration. In the example below, only PPV channels are selected.
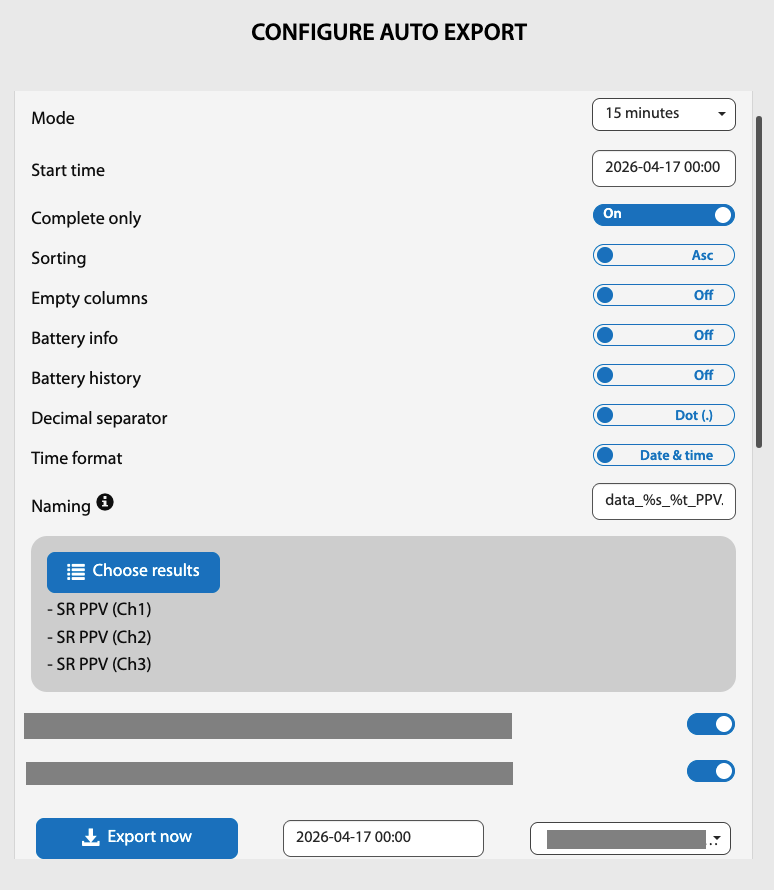
Important: If you also need VDV output, create a separate export configuration for VDV. In Svannet, VDV is provided from a separate channel and should be configured as its own export.
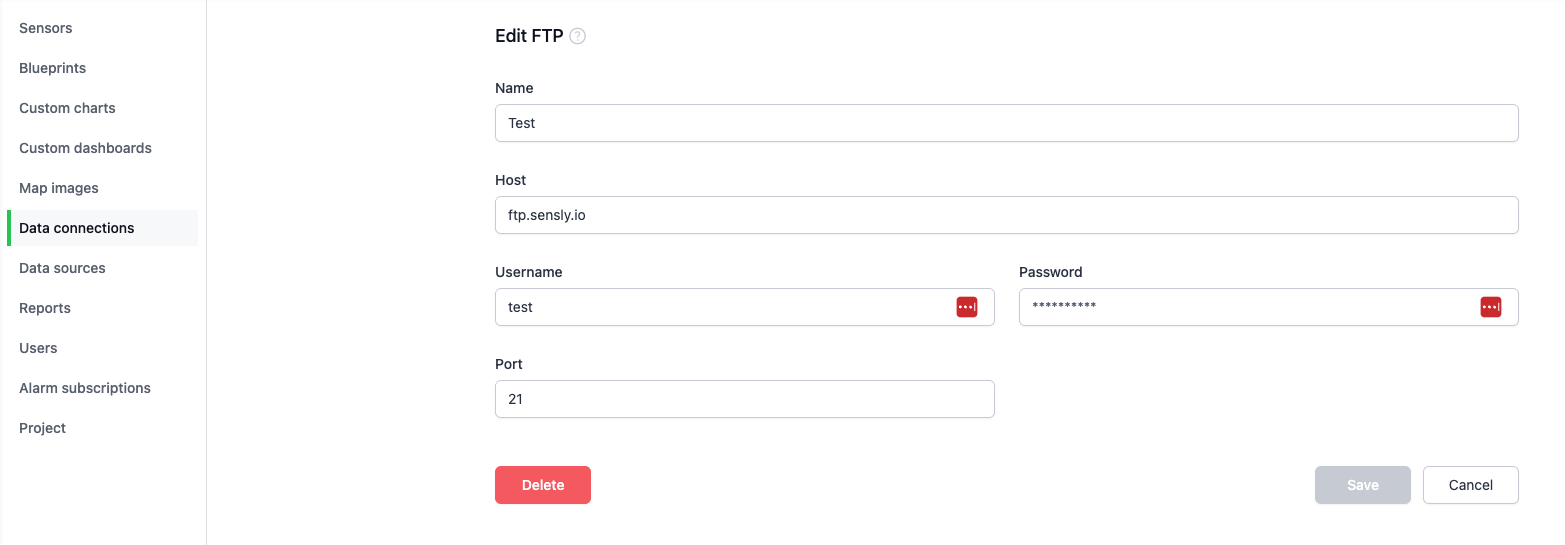
2. Add a data connection
In the Sensly portal, add a data connection and choose FTP. Enter the FTP server credentials for the server where Svannet uploads its files.
3. Add a data source
Under Data sources, create a new data source using the FTP connection you created.
Specify the file path where Svannet uploads the data file.

Set the schedule for when to check the FTP server for updated files.

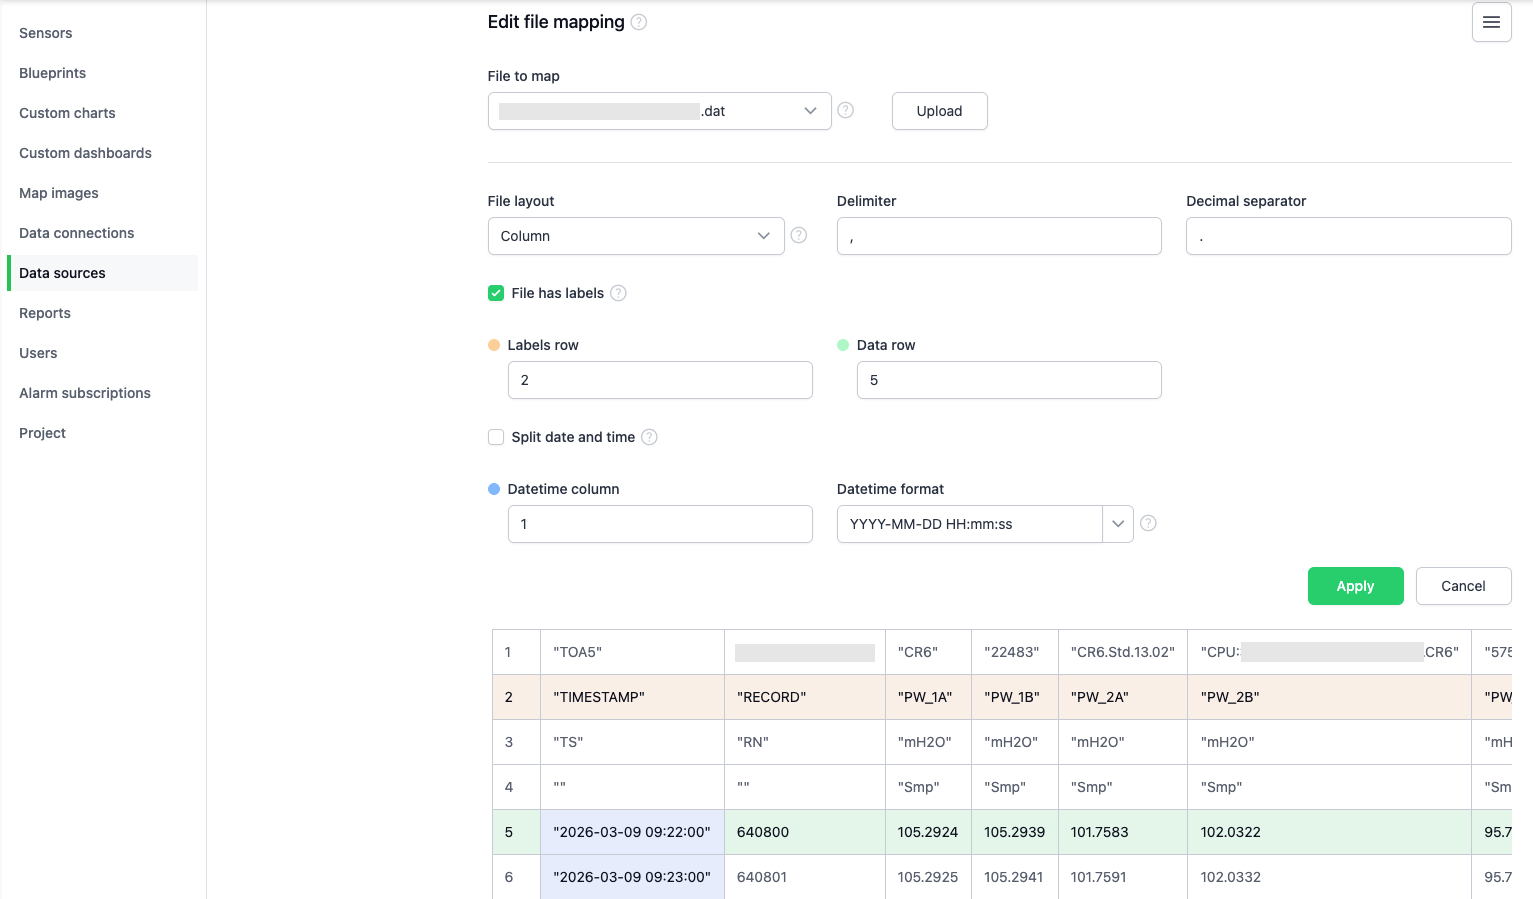
4. Map the file
Configure the file by selecting the File to map from the directory. If only one file is found, it will be auto-selected.
Note: If additional files appear in the File to map dropdown that you do not want processed, update the File match string on the data source details page to filter them out.
Select the Labels row (the row that identifies each column for matching to sensor inputs) and the Data row (where the data starts, so the header is not processed). These rows may vary depending on how Svannet formats your export file; choose the rows that match your file layout.
Select the Datetime column; the Datetime format will be auto-populated but can be edited if needed. The notation for datetime formats is described in 5. Datetime format in Data sources.
5. Map the sensor inputs
Map the platform sensor inputs to the corresponding columns in the Svannet data file.
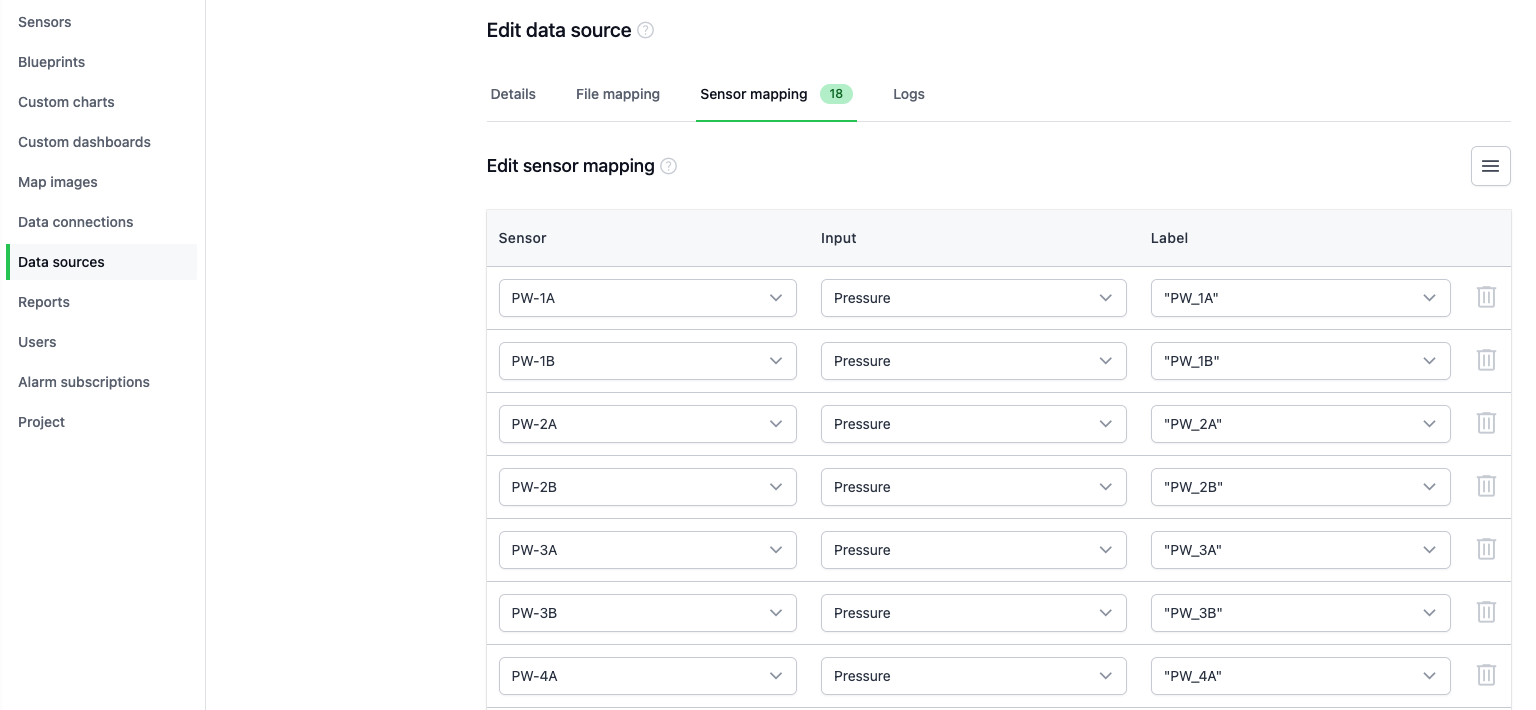
Once configured, the platform will automatically import new records from the uploaded files and update the sensor data.
Note: If additional sensors are mapped after a file has been processed, the data source will need to be re-run by reprocessing the data.