YDOC
This guide walks through connecting YDOC devices to the platform using FTP file uploads. The YDOC system exports measurement files and periodically pushes them to an FTP server, which the platform then reads automatically.
Note: We recommend creating a Blueprint and your Sensors first, so that when you map the data source labels at the end of this guide, you have sensors to connect to.
1. Configure the YDOC device to push via FTP
On the YDOC data logger, navigate through the terminal to the FTP settings menu. You do not need custom software on a separate server; FTP delivery is configured on the device itself.
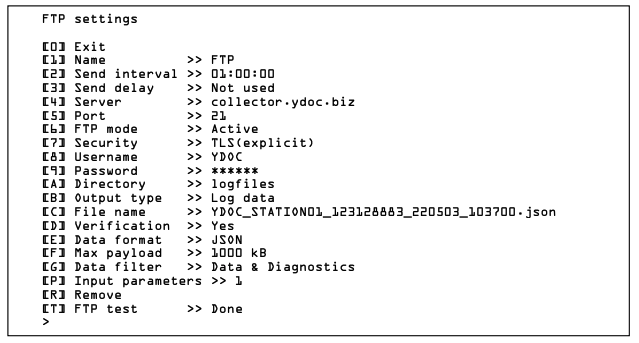
Work through the numbered and lettered options to match your deployment:
- Send interval and Send delay control how often files are uploaded.
- Server, Port, FTP mode (active or passive), and Security (for example TLS) must match what your FTP host allows.
- Username, Password, and Directory are the credentials and folder on the server where files are written—use the same FTP endpoint you configure in the platform.
- Output type, File name, Verification, Max payload, Data filter, and Input parameters depend on your logger model and what you export.
Set Data format to CSV. The platform expects comma-separated text it can map by column; other formats (for example JSON) are not suitable for the standard FTP file-mapping flow in this guide.
Use FTP test (if available) to confirm the device can reach the server. Once saved, YDOC will push files on the schedule you set.
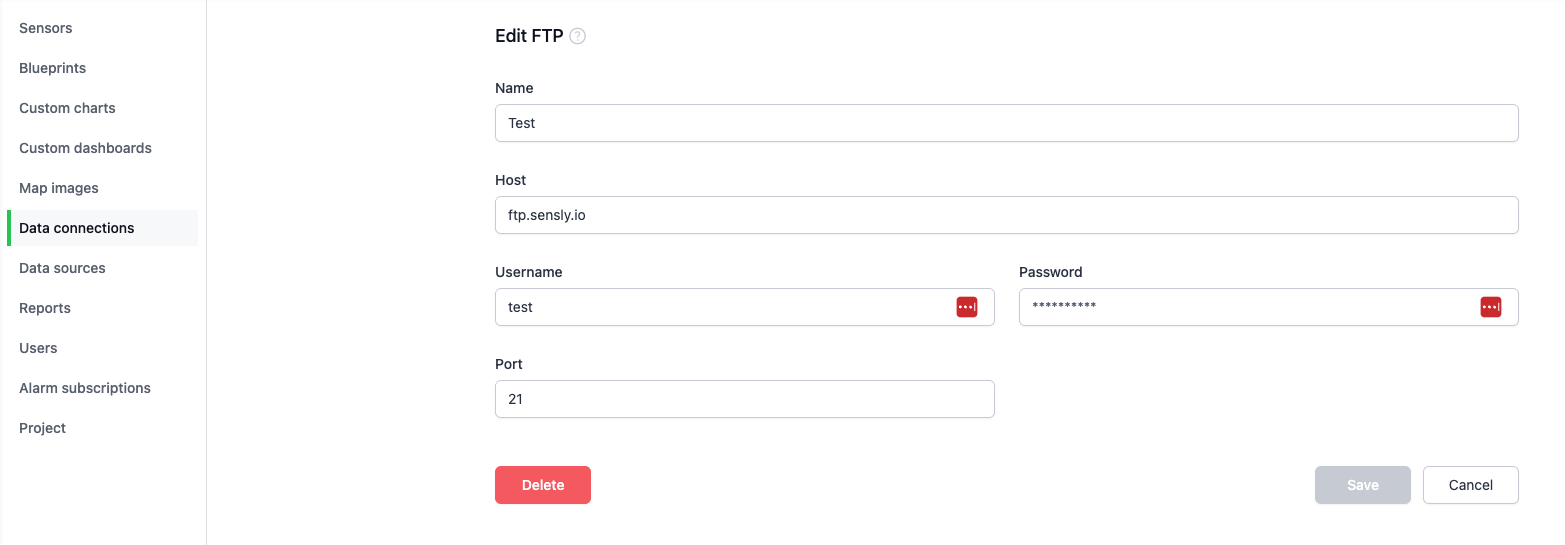
2. Add a data connection
In the Sensly portal, add a data connection and choose FTP. Enter the FTP server credentials for the server where the YDOC portal uploads its files.
3. Add a data source
Under Data sources, create a new data source using the FTP connection you created.
Specify the file path where the YDOC portal uploads the data file.

Set the schedule for when to check the FTP server for updated files.

4. Map the file
Configure the file by selecting the File to map from the directory. If only one file is found, it will be auto-selected.
Note: If additional files appear in the File to map dropdown that you do not want processed, update the File match string on the data source details page to filter them out.
Select the Labels row (the row that identifies each column for matching to sensor inputs) and the Data row (where the data starts, so the header is not processed). These rows may vary depending on how YDOC formats your export file; choose the rows that match your file layout.
In YDOC CSV exports, Date and Time are usually in separate columns (for example column 1 for the date and column 2 for the time). Enable Split date and time, then set Date column to 1 and Time column to 2. Choose Date format and Time format to match the file (for example DD/MM/YYYY and HH:mm:ss).

5. Map the sensor inputs
Map the platform sensor inputs to the corresponding columns in the YDOC data file (for example displacement, tilt, temperature, or water level).
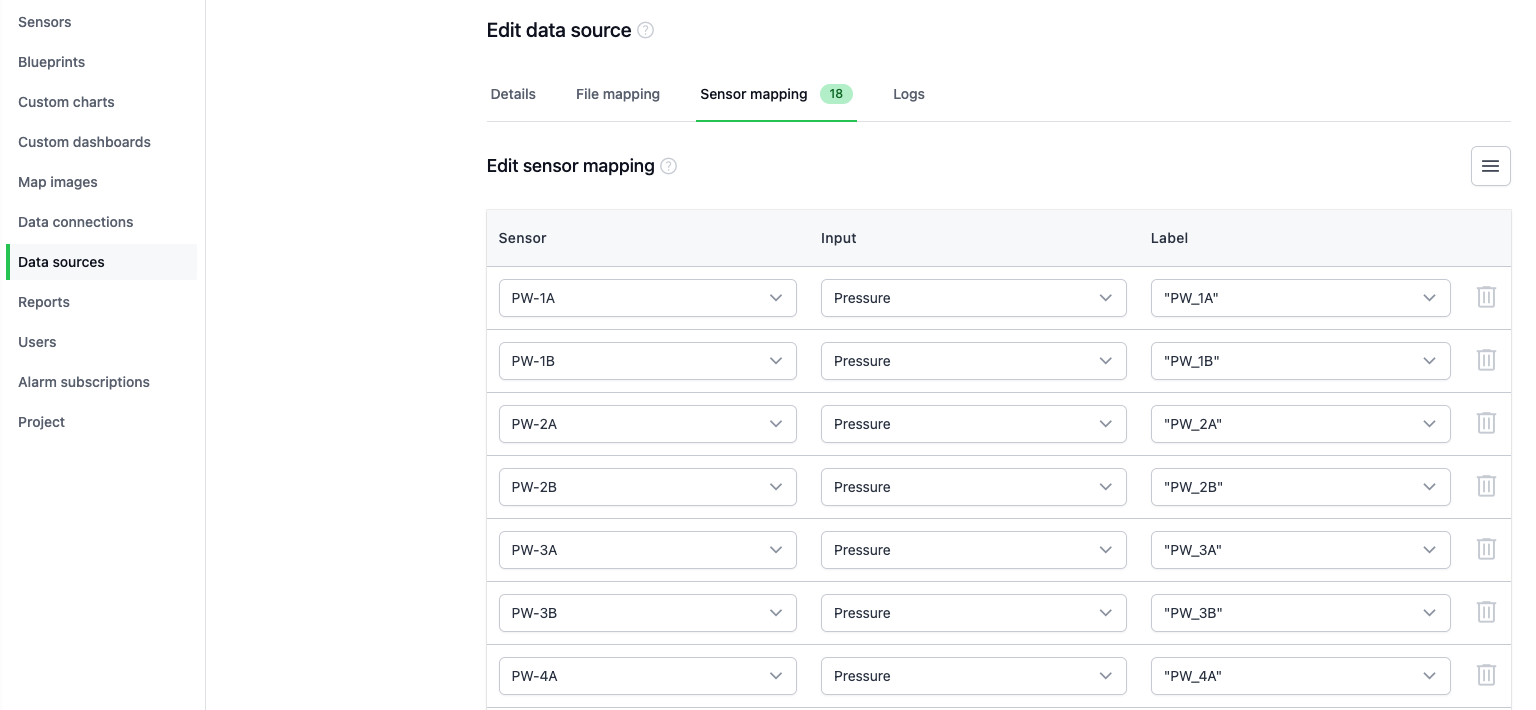
Once configured, the platform will automatically import new records from the uploaded files and update the sensor data.
Note: If additional sensors are mapped after a file has been processed, the data source will need to be re-run by reprocessing the data.