Worldsensing FTP
This guide walks through connecting Worldsensing devices to the platform using FTP file uploads. The Worldsensing system exports measurement files and periodically pushes them to an FTP server, which the platform then reads automatically.
Note: We recommend creating a Blueprint and your Sensors first, so that when you map the data source labels at the end of this guide, you have sensors to connect to.
1. Configure the Worldsensing portal to push via FTP
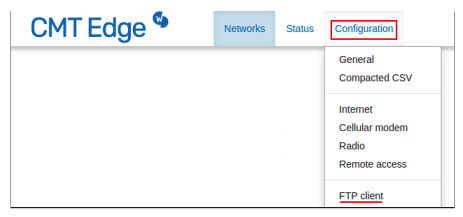
Log in to CMT Edge (Worldsensing’s device management portal) and open the network or device you want to connect. You do not need to write a program; FTP upload is configured in the portal. From the top navigation, choose Configuration → FTP client to open the FTP upload screens.
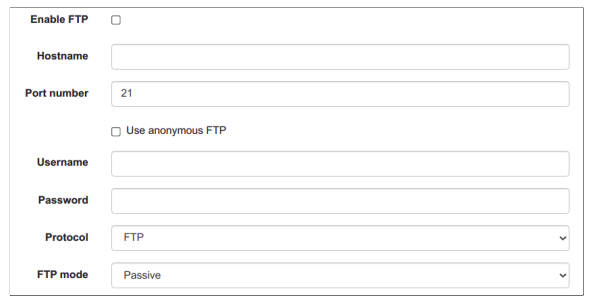
On the FTP settings page, enable FTP and enter the connection details for the server where the platform will read files: hostname, port (often 21), username, and password from your platform FTP integration. Leave Use anonymous FTP off unless your server requires it. Set Protocol to FTP (or the option your server expects) and FTP mode to Passive unless your network needs active mode.
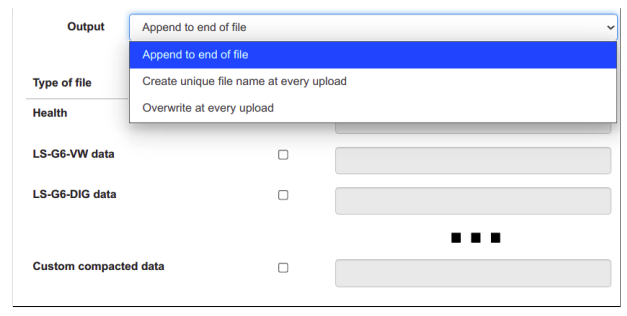
For each data type you export (for example health, sensor channels, or custom compacted data), set Type of file and Output. The Output menu controls whether each upload appends to an existing file, creates a unique file every time, or overwrites the same file—pick the behavior that matches how you configure the file path and matching rules on the platform data source. Enable the rows you need and set filenames or paths as required by your deployment; you can also configure remote directory, upload schedule, and related options elsewhere in the same portal workflow.
Use the FTP server details that you have set up for the platform integration. Once configured, Worldsensing will regularly push updated data files to the FTP server.
2. Add a data connection
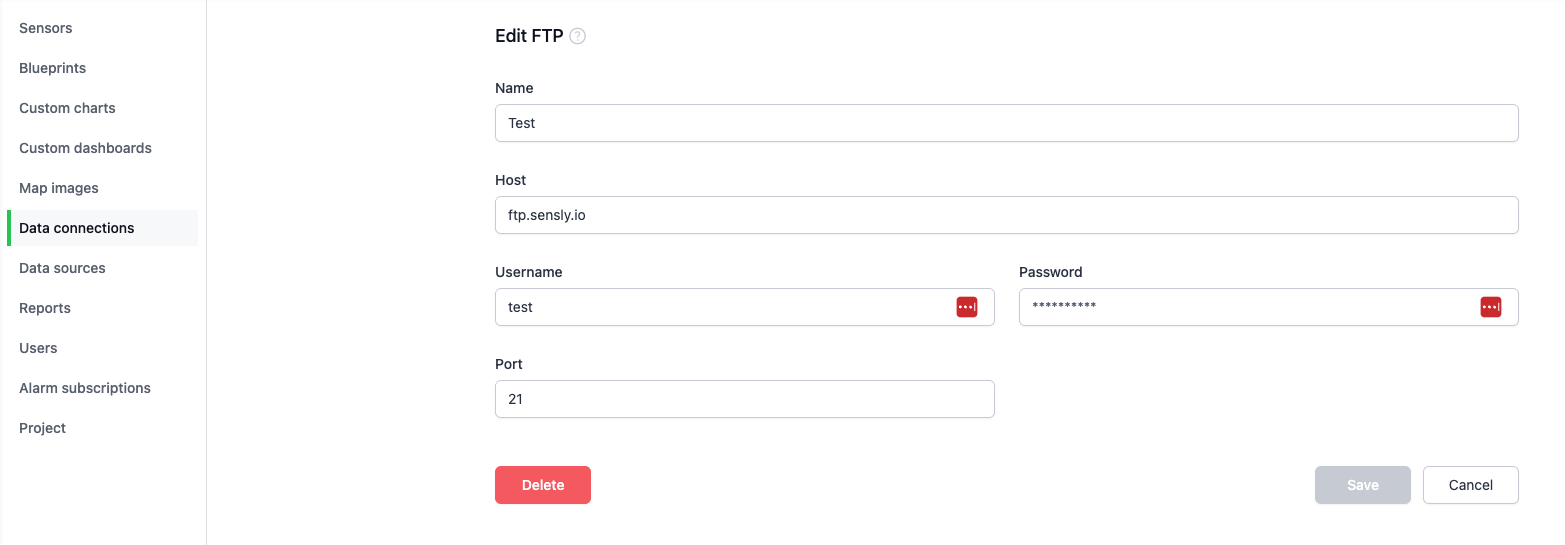
In the Sensly portal, add a data connection and choose FTP. Enter the FTP server credentials for the server where the Worldsensing portal uploads its files.
3. Add a data source
Under Data sources, create a new data source using the FTP connection you created.
Specify the file path where the Worldsensing portal uploads the data file.

Set the schedule for when to check the FTP server for updated files.

4. Map the file
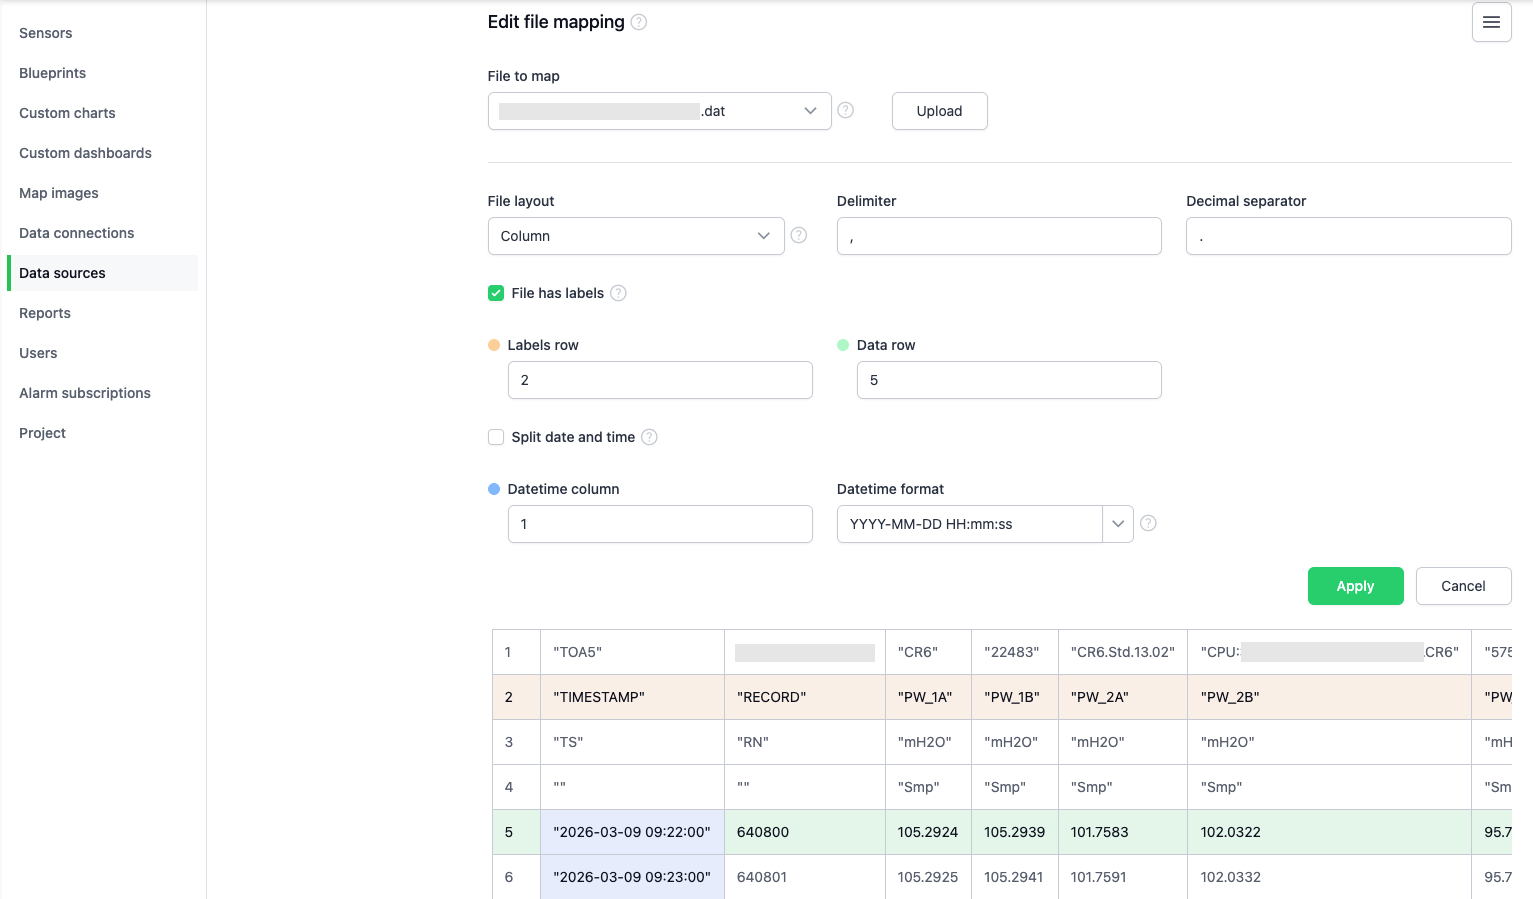
Configure the file by selecting the File to map from the directory. If only one file is found, it will be auto-selected.
Note: If additional files appear in the File to map dropdown that you do not want processed, update the File match string on the data source details page to filter them out.
Select the Labels row (the row that identifies each column for matching to sensor inputs) and the Data row (where the data starts, so the header is not processed). These rows may vary depending on how Worldsensing formats your export file; choose the rows that match your file layout.
Select the Datetime column; the Datetime format will be auto-populated but can be edited if needed. The notation for datetime formats is described in 5. Datetime format in Data sources.
5. Map the sensor inputs
Map the platform sensor inputs to the corresponding columns in the Worldsensing data file (for example displacement, tilt, temperature, or water level).
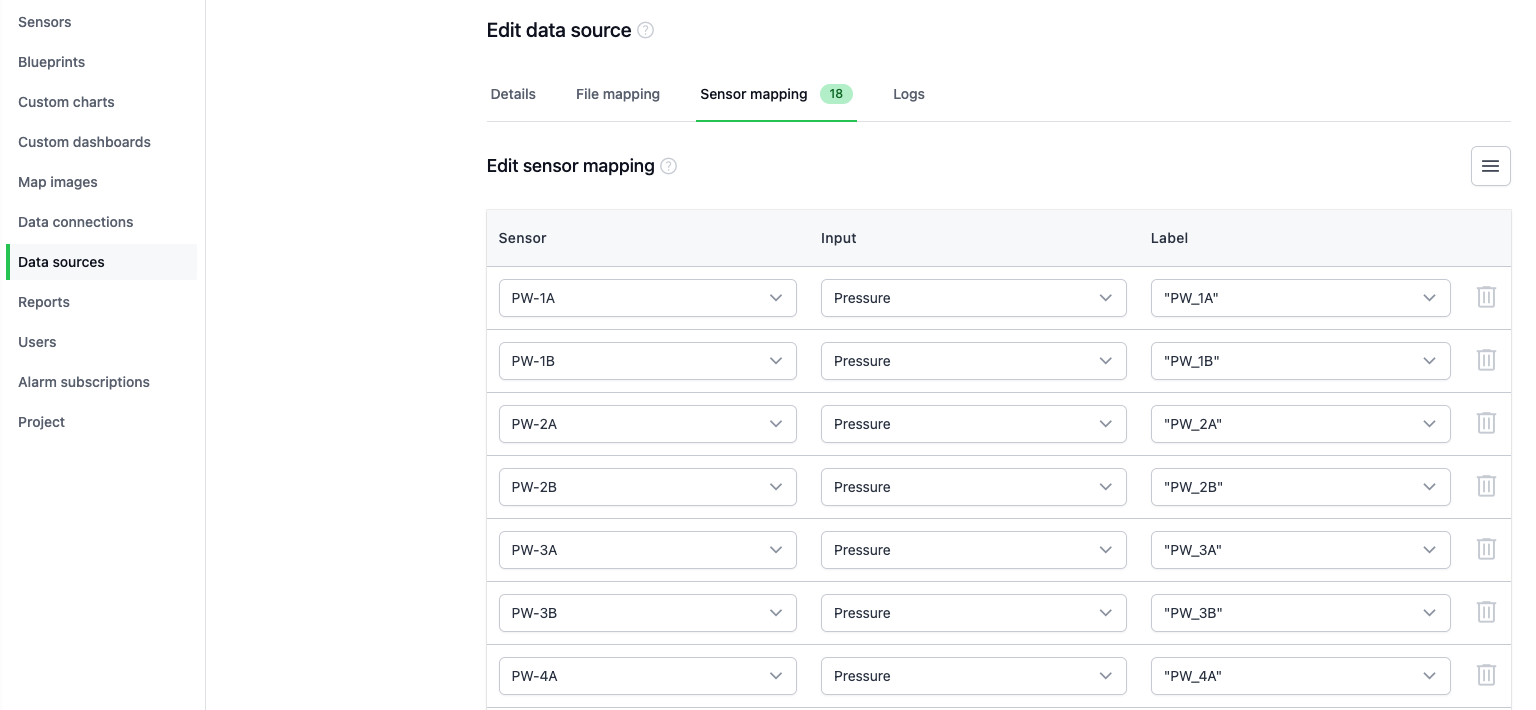
Once configured, the platform will automatically import new records from the uploaded files and update the sensor data.
Note: If additional sensors are mapped after a file has been processed, the data source will need to be re-run by reprocessing the data.